Replace battery on a
Cardo Scala Rider Q2


After 2.5 years my pair of Cardo Rider Q2 Bluetooth intercom only
worked for 3 hours until the battery was dead.
It's a quite normal lifespan for a battery, especially if you need
all the capacity it has to offer. On a normal daytrip we use it 8
hours or more.
OK, so I was thinking Cardo would simply replace the battery.
Since the case has lost all its rubber coating, a refactoring
including a battery replacement was what I expected from a world
leader company like Cardo.
So I asked what to do with it, and here's what I got for an answer:
Rolf,
Thank you for contacting the Cardo Systems Support Center.
There is no out of warranty service for scala rider batteries in
Europe.
You would need to purchase a new scala rider headset in this case.
Please feel free to contact us if we can assist with any other
questions.
Best regards,
xxxx xxxxx
Great !!!
So throw away the unit and get a new one!
I did not like the idea of throwing away € 300 after only 2.5
years, so I decided to help myself.
The most difficult part was:
- Opening the case
- Find a replacement battery
To open the case you can find instructions below.
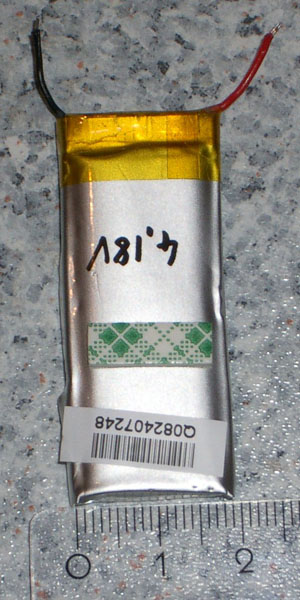
The original battery is a Lithium
Polymer Battery rated 3.7 Volts and
400 mAh.
Make sure the replacement battery has the
right dimensions.
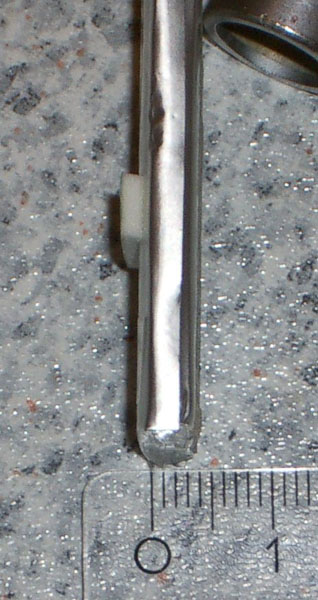
The original battery dimesions are 1,9" x 0.75" x 0.16" (49mm
x 19mm x 4,5mm)
 |
 |
 |
After some research I found a replacement battery that will
fit.
It is a replacement battery for the
iPod 5.Generation / iPod Video (5-30GB) / iPod Classic (80GB)
When you buy one, make sure the dimensions are the same as described above.
I have heard about IPOD batteries being too thick to fit in the case,
so before bying one, check the dimensions.
 |
You can easily find batteries like that on ebay.
They are about 6 Euros or 6US$/piece.
The one I used was from
reichelt in Germany, rated at 1.67 Wh or
450 mAh. So the new one has about 10% more capacity.
After 2 more years now the new battery stil works
So here are some instructions to help you replace the battery on a Scala Rider Q2.
For additional questions ask me.
Nov. 26 2014 UPDATE:
After 3 years that I replaced the battery, it still works for 8 hours without the
"battery low signal beep".
I never ran out of battery since I replaced mine, and when we ride we
are apart at least 100feet.
I guess the quality of the replacement battery is way better than the original.
But it depends on what you get…
If your LED does not light up when you plug in the charger:
SORRY.
I can’t repair your unit. This fix is for working units only.
I had several questions for units that do not light up when the charger is plugged in, but only one unit
so far (that was sleeping in the garage for 3 years and therefore was deep-discharged) could be reanimated by replacing the battery.
Feel free to contact me when in doubt...
 |
I assume that you know what you are
doing, before starting to fiddle arround with your device! I cannot be held responsible for any damage that may result from the use of the instructions found here! |
Best regards
Rolf
You can click on the images for larger view!!!
|
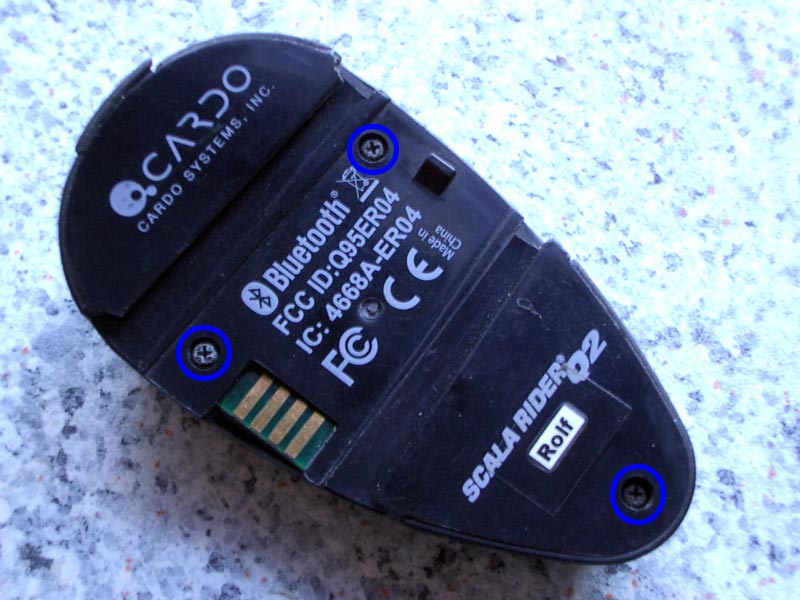
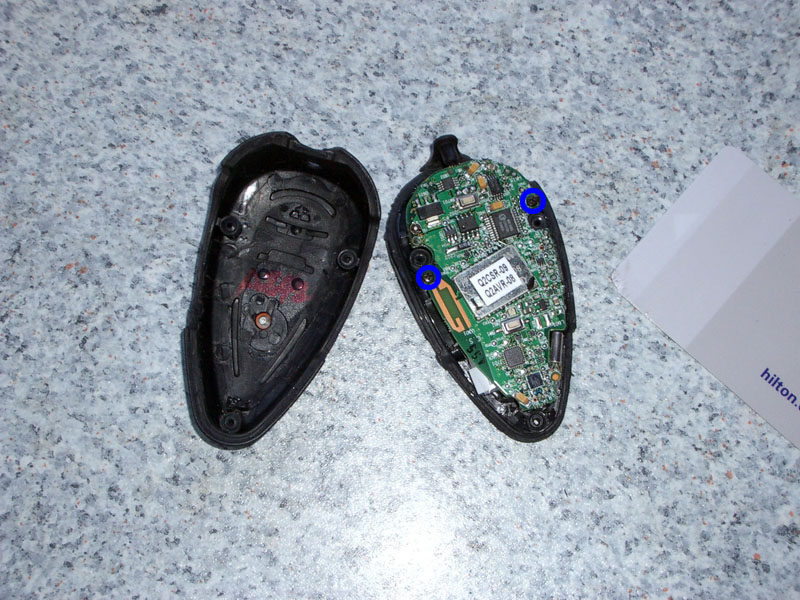
To open the case you have to remove the three screws on the back marked in blue. In my case the screws were Phllips but on more recent units you might find Torx T6 screws:  |
|
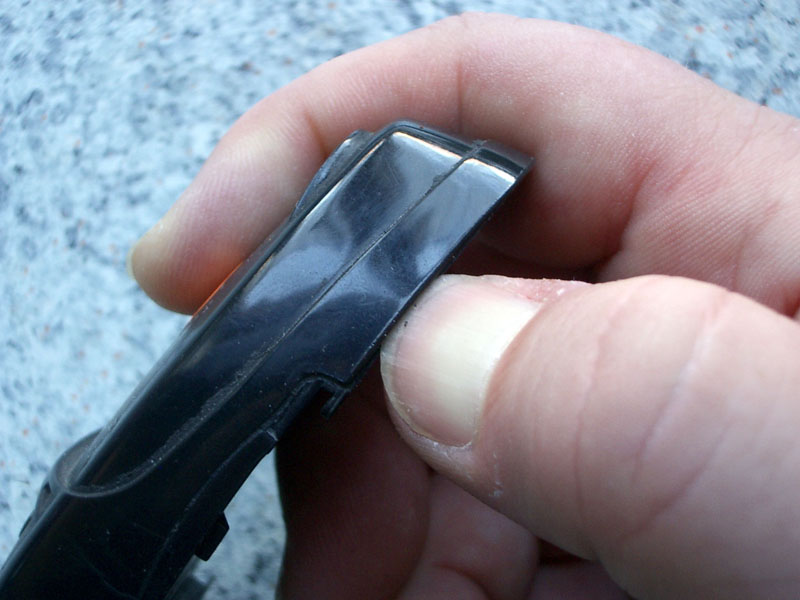
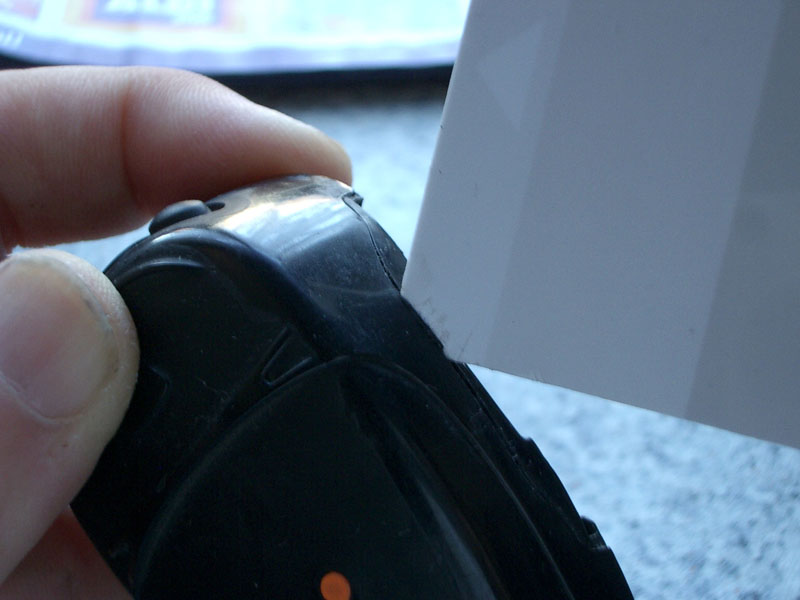
After removing the screws you'll notice that the case does not open. This is because the case is sealed with silicon glue. You have to cut through the silicon all arround the edges of the case to tear it apart. If you have strong fingernails like me, it is the best way to do it, because you can "feel" where you need to apply the force. |
|

|
Go all the way arround the case. |
|
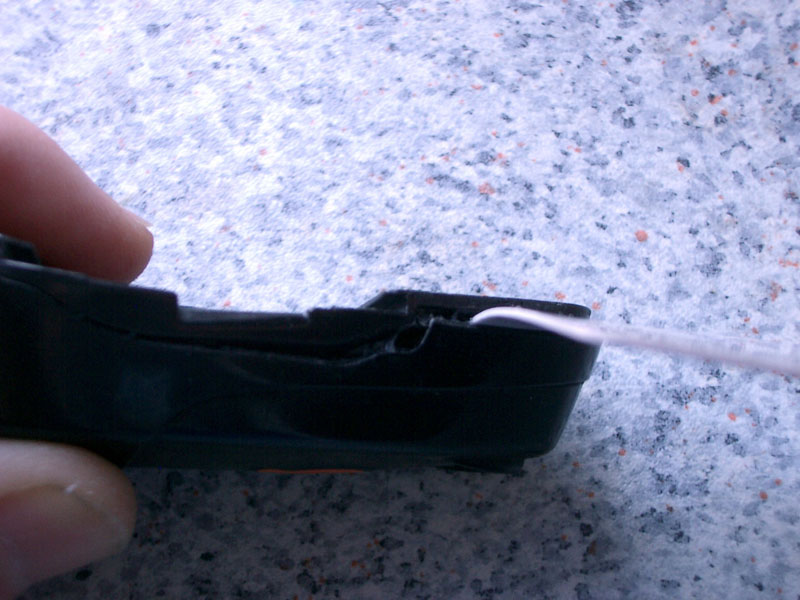
You can also use an old credit card, make sure you flatten the edge, so you don't have to stress the plastic case. |
|
|
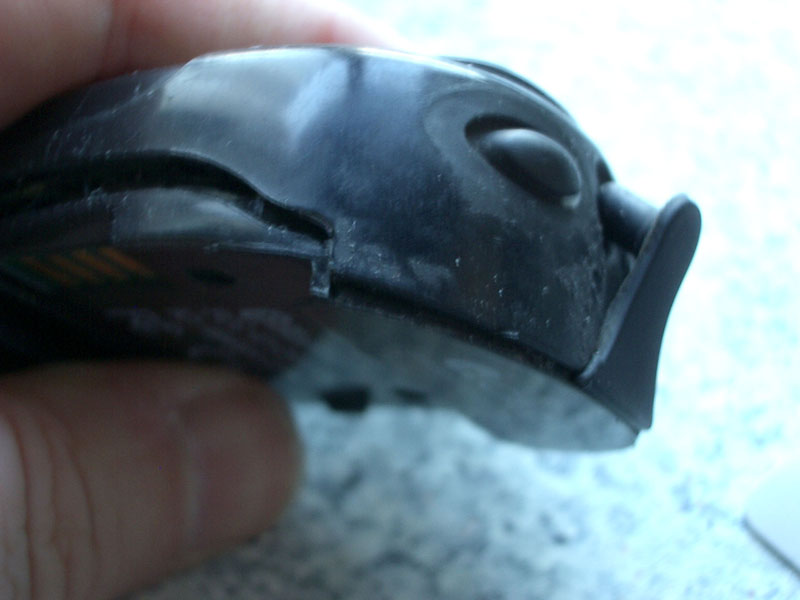
If the silicon seal is cut all arround the case, you can gently try to crack it open. |
|
Almost open, but: Don't forget to pull out the rubber plug! |
|
|
To get to the battery you have to remove two more screws.
|
|
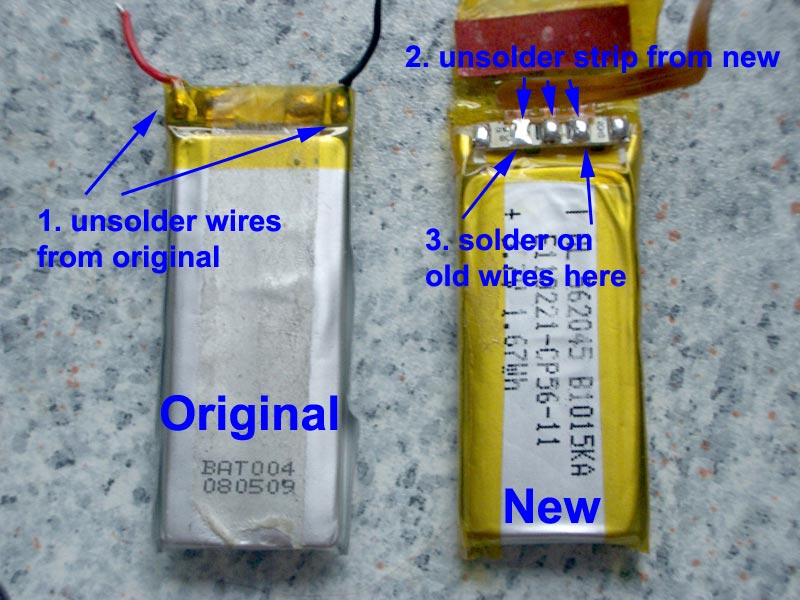
The IPOD replacement battery comes with a flexible conducting path. We have to get rid of that one, After that, you can assemble the unit again. Do not forget to remove excessive silicon
rubber It's up to you, to apply new silicon to seal it again. |
|